Windmill Restoration April 2008

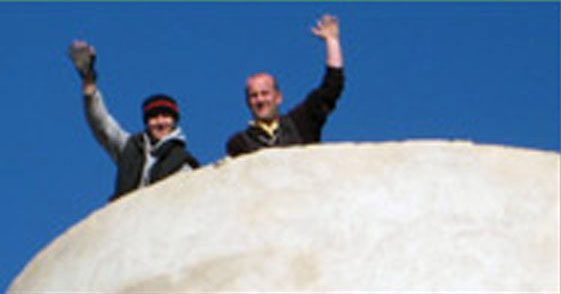
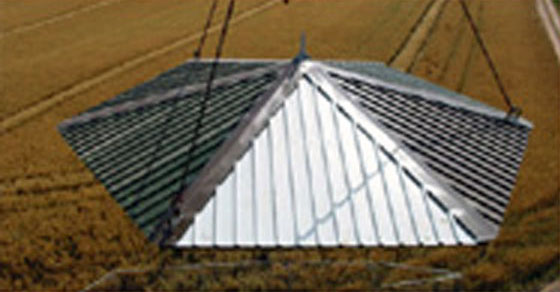
Bob made the fantail. It is 3700mm diameter but looks much larger, stood in the workshop, and weighs 803kg. We had a technical error, which resulted in the wrong size shaft being used (I must learn to use the right scale rule). To overcome this, Bob had to substantially stiffen the centre of the fantail and hopefully it should now be ok.

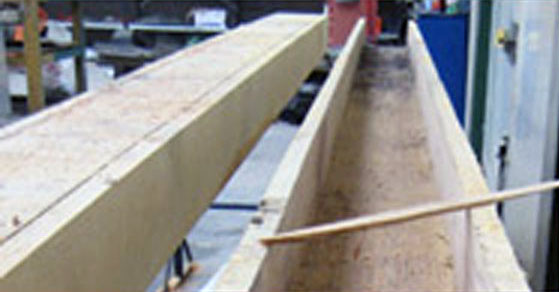
The blades of the fantail have been made from 3mm thick steel which has since been galvanised and sandwiched between two layers of exterior grade MDF board. Grooves were routed in the MDF board to give the appearance of T&G boarding, which, from a distance should look somewhere near the original.
To help with the carpentry, Wieslaw and Krzysztoe have joined the team. As you might possibly tell by their names, they are Polish.

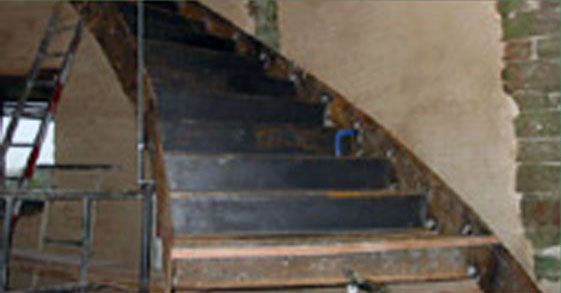
40mm thick Oak boards have now been fitted to the balcony. We are not yet sure what to use as balustrade, however toughened glass would now appear the best choice.

Windmill Restoration March 2008

Internal partitions have now been constructed to form six double bedrooms, three of which have on-suite shower rooms and one with an on-suite ‘wet room’.

All of these will keep Gareth tiling for a good few weeks. The lead flat roof and valley have now been laid to the drying store and it looks really good.
Mark has started plastering inside which is a really slow process.

The first two coats comprise of a 3 to 1 mix of QV blended sand & hydraulic lime (NHL) with the addition of synthetic hair. The final coat is a traditional fat lime finish.

The new partitions, which have been plaster boarded, have had a coat of Carlite bonding to give the same appearance as fat lime.

An axle was bolted onto the cap frame so that it could be towed to site ready for a trial lift.

Windmill Restoration February 2008

Once the cap frame returned from the galvanizers, the fly spears, back stays and handrails were welded in place and it now weighs 4.4 tons.

A sprinkler system was fitted throughout the mill and drying store. This enabled all five floors in the mill to be utilized for living purposes without the need of a fire escape. It will also enable us to use oak doors, rather than fire doors throughout the building.

We had to lift off the temporary roof so that the tanks for the sprinkler system could be fitted on to the very top floor. It’s surprising how much lighter the building appears with no roof.

Under-floor heating has also been fitted to all the upper floors as well as the ground floor. This has now been installed and boarded out with chipboard. The final flooring will be engineered oak glued to the chipboard.

Windmill Restoration January 2008

Bob started fabricating the main frame for the cap. The original frame would have been made from timber but, as usual, we made ours from steel box section.

We were keen to keep the cap looking as near the original as possible, so all the steel used was matched in physical dimensions to what the original would have been.
We managed to find some old steel wheels on a scrap gantry crane which have now been re-packed with grease and fit neatly to the cap frame.

These re-cycled wheels should allow the cap to rotate smoothly, fingers crossed.
Once the cap frame was fabricated it measured 25’ long x 11’ wide! We transported it to Hereford Galvanizers and had it dipped in one piece.

Windmill Restoration December 2007

With the roof now complete on the drying store we were able to work in the dry, excavating approximately a foot of soil by hand under the watchful eye of Monmouth Archeology, who carried out the archeological survey. Various cast iron articles were found including gears, hinges, nails & bits of track off the mill.

Once the documentation had been carried out a concrete floor was laid with insulation, under floor heating and a liquid screed.
Bob had got the hang of making staircases and before Christmas had reached the top floor.
To hide the steel floor and ridge beams 10” x 8” oak beams were hollowed out, which was a fair amount of work, but it was well worth the end result.

Windmill Restoration November 2007

A new timber roof was “cut” onto the drying store supported on new steel ridge beams. The roof was then slated using Spanish slates, set in diminishing courses.

Gareth took great pride in the curved section of roof which looks good now it’s completed.
With the stringers and step supports in place on the first flight of stairs, 80mm thick stone treads were cut and shaped ready to be fitted at a later date.

Windmill Restoration October 2007

The new balcony steelwork was assembled in 18 sections on the ground and subsequently craned into position. Once weather permits it will be primed and painted, so it should look as close as possible to the original.

We bought a set of 8’x1/4” pyramid rolls off ebay so Bob was keen to start rolling the stringers for the first flight of stairs. Due to the size of the stairs (first flight 21 steps) and the fact that this flight is both curved & tapered we decided to weld the stairs together ‘in-situ’. It took a lot of hands and G clamps to hold all the various bits ‘in-situ’, but overall the steps seemed to follow the wall fairly well.

Windmill Restoration September 2007

During September the walls of the drying store, which had collapsed over the years, were re-built using stone and lime mortar. It was possible from the existing pockets in the walls to work out both the first floor and apex level, enabling the re-built walls match exactly the original profile.

A new box section balcony was fabricated and galvanized in sizes to match the original. The size and section of the balcony was determined by the sole surviving strut which had been left protruding from the tower since it had burnt down all those years ago.

Windmill Restoration August 2007

New Oak windows were made by a local joiner, Lyndon Hawkins. The windows fitted perfectly, but no such luck with the glass. Phil the carpenter will have to learn how to read the drawings properly!

One of the planning stipulations stated that the tower must be lime rendered with materials to match the original. A sample of the original render was sent to Ty-Mawr Lime so a match could be blended complete with Horse hair. As the weather forecast was good John Edwards and his team were eager to get the tower rendered from the top down to balcony level. This was subsequently achieved without any difficulty.

It will be 2008 before the cap is made, therefore we decided to fabricate a temporary roof to keep out the elements during the winter months. This has been fitted, complete with a Skull & Cross bones flag now flying high above the Monmouthshire countryside.

Windmill Restoration 15th July 2007

From the remains of the original pieces of cast iron track, which were still perched precariously on the top of the tower, we were able to determine that the diameter of the original track on which the cap rotated was 4540mm.

The original track comprised of 16 separate sections which would have been screwed to oak timbers which would have been bedded onto the top of the stone tower. The top 450mm of stone work was in such a poor state that, due to safety issues, we decided to replace the damaged stone work with a poured mass concrete ring beam and set the new track to this.

The new track was fabricated in one piece from 80mm x 50mm profile cut to the correct diameter welded to a 250mm x 10mm plate, like a very large washer. The new track, weighing around 760kg, was craned into position. Shuttering was secured to match the profile of the tower and 16 runs of T16 reinforcing were wired into position. All this was then cast within 8 tons of concrete.